
A laptop is a very useful computer for anyone who values mobility. However, that mobility comes with a limitation of user accessibility and comfort. How? Well the laptop’s display is really too small to work with!Read on to discover how to connect two or more displays to a laptop.
Adding Monitors Utilizing a USB External Display Adapter
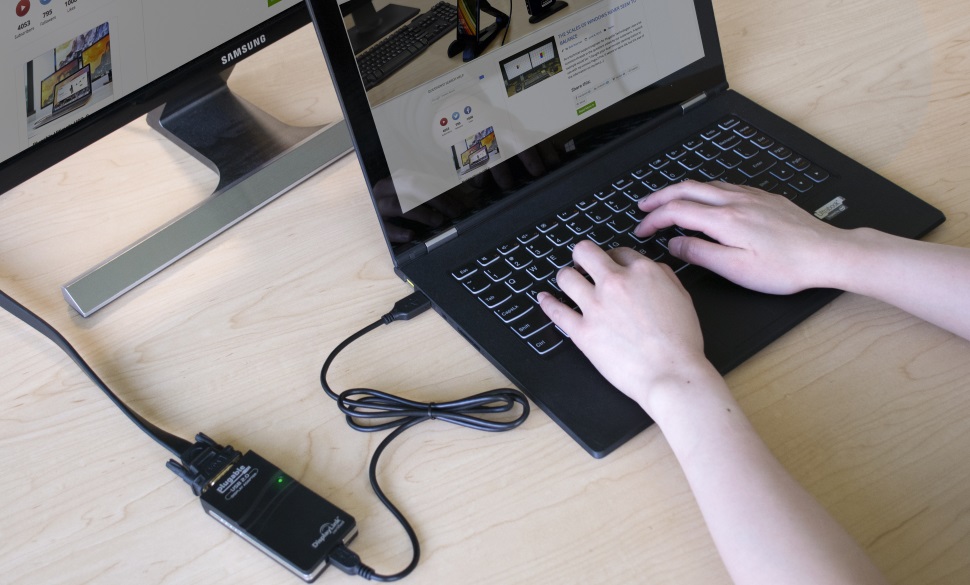
There are several ways through which you can connect multiple monitors to a laptop. Using USB cables is an easy and effective one among them.
An USB external display adapter provides the functionality to add extra displays to your laptop through its USB ports. The display adapter can have a HDMI, DisplayPort, DVI, or VGA port.
Although, the latest adapters are designed to use the USB 3.0 standard, the good news is that USB standards are all universally backwards compatible. So an adapter that uses the USB 3.0 port can be used on an older USB port such as the USB 2.0.
Some display adapters require a driver software custom tailored to their specification while others are perfectly all right with generic drivers that are pre-installed into the latest Windows operating system.
Do not fret if your adapter needs a driver though! Just a quick search on the internet and you can get the required drivers from the manufacturer’s website or from the many driver download sites.
Using a Thunderbolt Port
The latest laptops have a newer standard of USB port called the USB Type-C or Thunderbolt Port. It is a technology that was developed by collaboration between two tech giants Apple and Intel. The Thunderbolt port is oval shaped and is usually found near the power adapter port of a laptop.
The Thunderbolt port’s specialty is that you can connect a full docking station that provides multiple display connectors through that single USB Type-C cable. Such docking stations may have not only multiple display connectors, but also audio jacks as well as RJ-45 data ports for internet connectivity.
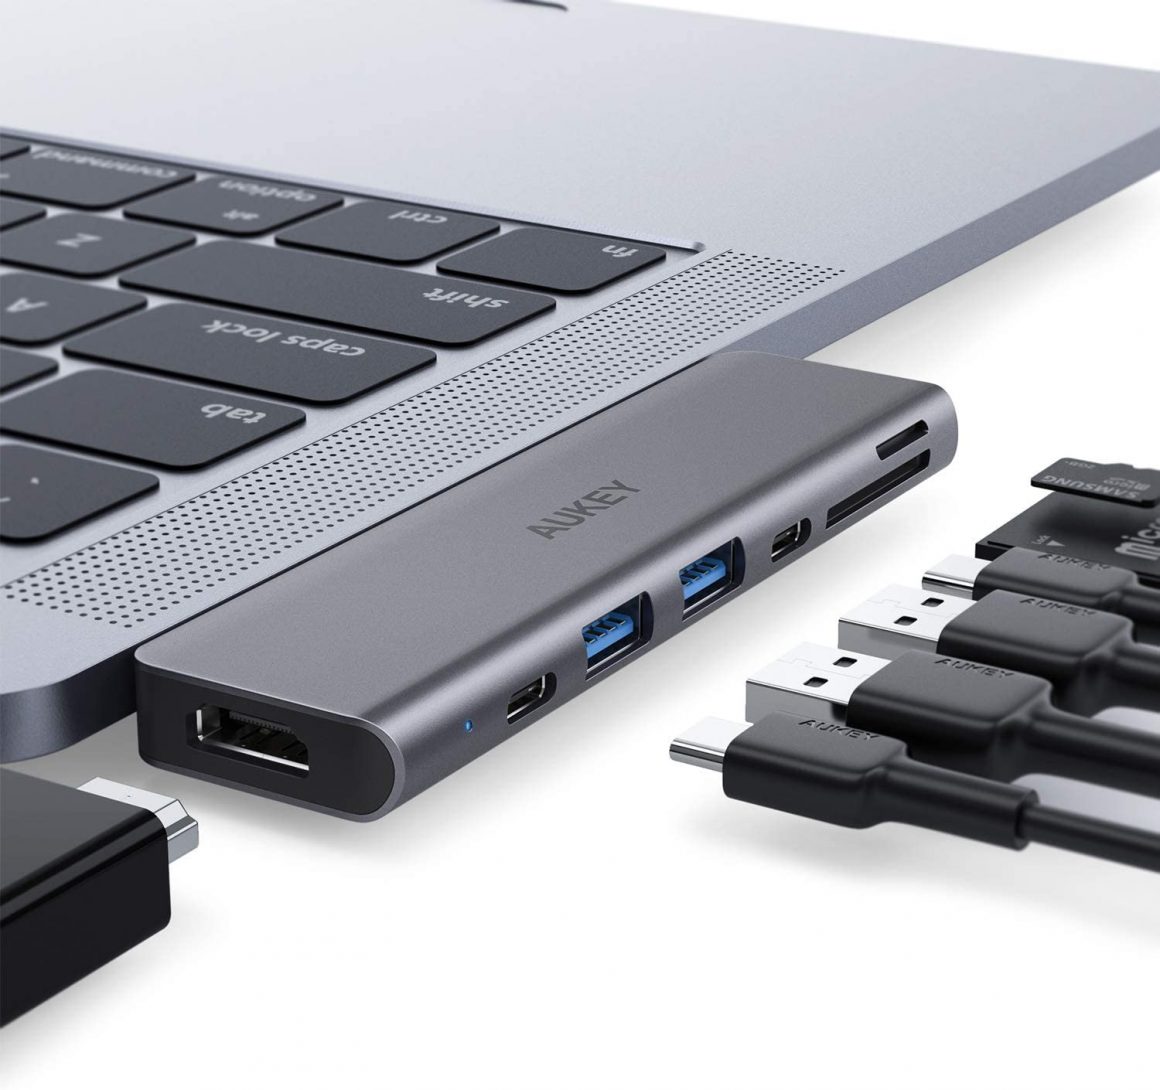
However, if you do not want to incur the expense of going with a full range docking station then you can also purchase a Thunderbolt adapter which usually only has two or more external HDMI and DisplayPorts.
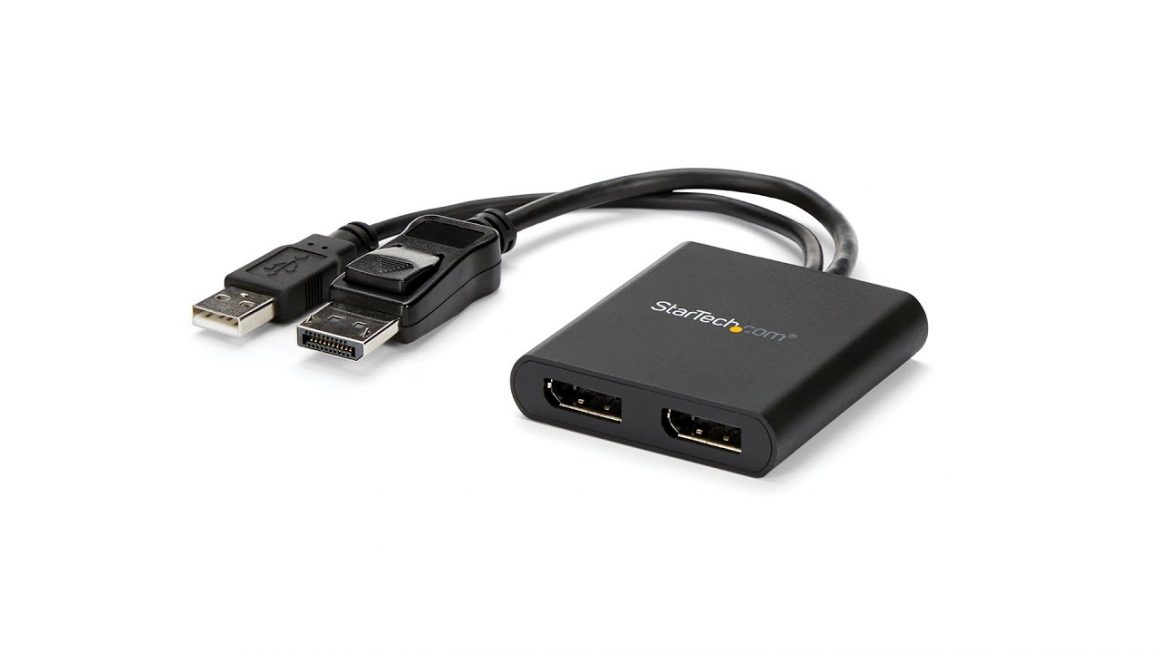
DisplayPort Splitter Adapter
Display port splitter is an adapter that can take the single VGA or HDMI or DVI display output port on your laptop and extend your laptop’s display onto two or more external monitors.
Although, older models of the display port splitter adapter only mirror your laptop’s display, the latest adapters do also extend the laptop’s display across external monitors. So, before purchasing a display port splitter adapter, it is a good idea to be absolutely sure of whether the function is mirroring or extending the laptop’s display.
How to Setup the Software of Connecting Multiple Monitors to a Laptop
Now that the ways of connecting external monitors to a laptop have been discussed, we can move on to the software setup that will properly enable you to extend your laptop’s display across one or more external monitors.
One thing to note is that the laptop must be switched on, in order for the Windows operating system to detect the USB external display adapter, or the Thunderbolt docking station or adapter. Whereas, the display port splitter adapter is only a display cable that ends with two or more display cables, which may be connected to the external monitors.
Next, the two external monitors must be connected by display cables to the laptop by way of either exclusive display ports on the laptop itself, or with the help of the USB, Thunderbolt, or splitter cable adapters. Older models of laptops do have at least one VGA display port in addition to two or more standard USB ports while newer laptops have a HDMI ports, at least two USB ports and one USB Type-C port.
As almost all laptops are using the Windows 10 operating system nowadays, the following settings setup will follow the rules of Windows 10.
After the external monitors are connected to the laptop, using the mouse right click on an empty area on the desktop. A toolbar containing display settings (Windows 10) or screen resolution (Windows 8/7) will appear.

After entering the display settings, three icons of computer screens can be seen labelled as Display 1, Display 2, and Display 3. Now, generally Display 1 is considered the laptop’s own screen, while Display 2 and Display 3 are the external monitors.
To select one of the external displays, left click using the mouse on say Display 2 and then depending on whether you want to mirror or extend your laptop’s screen, select Extend the desktop to this display, and voila the laptop’s screen will be extended to the first of the external monitors. Repeat the same with Display 3 to have more visual working space. Before exiting the settings menu, make sure to click on Apply and then Ok in order to save the display settings which you just modified.
Choosing How to Connect Multiple Monitors
Adding external monitors to a laptop boils down to the hardware and, to some extent, the software capabilities of your external monitors as well as the laptop. For example, if the onboard graphics card of the laptop does not support multiple displays then I am afraid that you are out of luck and cannot under any circumstance connect your laptop to multiple displays.
Bottom Line
Before going for connecting multiple monitors to a laptop, always make sure that your laptop and monitors are compatible to whatever strategy you are going to use. Of course, if you are in need of multiple monitors, you already know your ways around the basics. Still, you can never be too careful!